
Berg Lake Trail (23km each way) Moderate
Author: Braedyn Brosda
The Berg Lake Trail was probably my favourite backpacking trip to date and I think the number three most beautiful place I have visited. We did a three day trip, one day hiking in, one day exploring and one day hiking out. I would say that the hike is not overly difficult barring one segment (which we will get into later). I think the best way to describe the hike is by breaking it into various segments as each part was quite different. Also, I would recommend staying at either Marmot or Berg Lake campground, but we will get into that later.
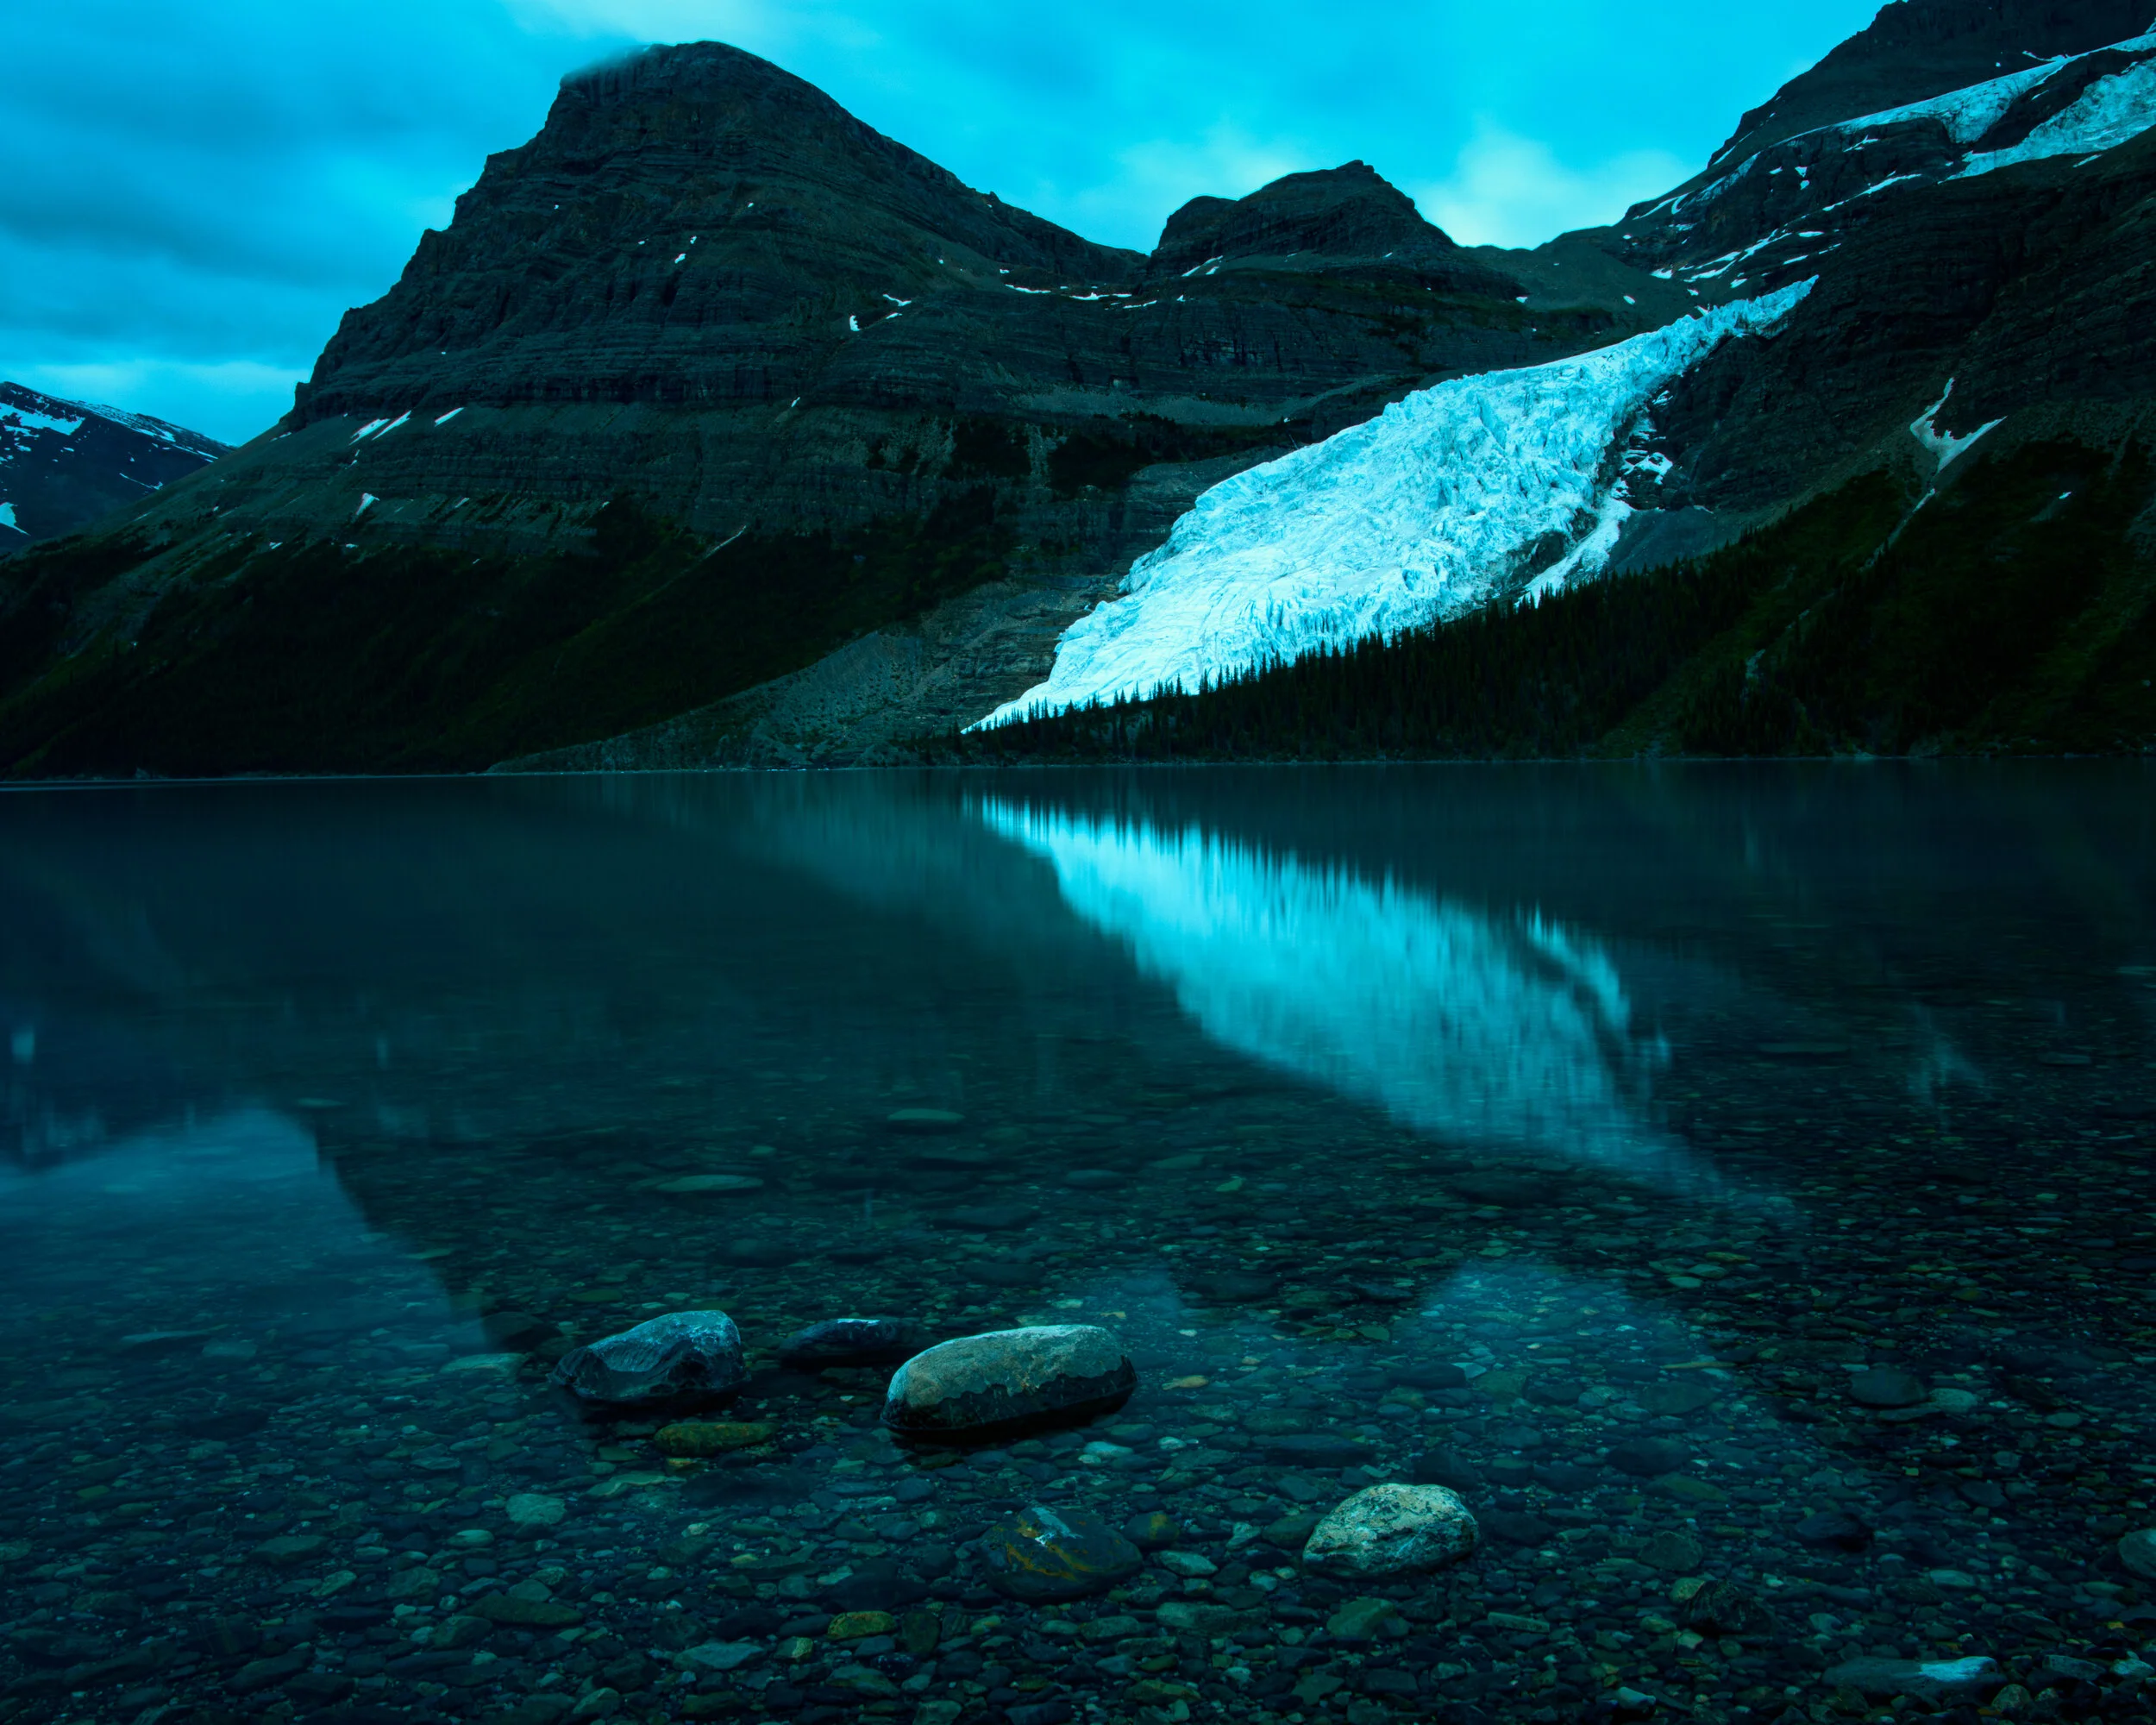
Berg Lake from our campground
Parking Lot to Kinney Lake (7km easy)
The first part of the trail starts at the Mount Robson parking lot and goes along a wide trail through the forest. I quite liked this part because it was different than our usual forests in Alberta, it was much greener because on this side of the mountain it is a rainforest. The huge cedars and mosses and ferns make it feel like an enchanted forest.

The Forest trail

This part of the trail is slightly uphill but not calf burning. For a majority of this segment you walk beside the Robson River. There are a couple of points to go down to the water before you divert up and away. After 7km in the enchanted forest, you will arrive at Kinney Lake. Kinney Lake is lovely and when we were there it was nice and calm, so there were great reflections off the water. We stopped for a little snack and to doctor one of our group member’s feet as the blisters had already begun for him.

Kinney Lake
Kinney Lake to Whitehorn (4km easy)
This segment of the trail is very different than the first part. When we went, there were two options for this part: either continue along the same path that follows the now hilly terrain through the forest or walk along the flats that were dry now that it was summer. We chose to go along the flats on the advice of some other hikers.
I think that this was a good decision. It was really cool walking between all the mountains next to the river. There were massive boulders everywhere and you could also see why the stretch was called the valley of a thousand falls. It really made you feel insignificant in an awe inspiring way.
Some of the thousand falls

The Flats
You will pop back into the forest for a bit of hiking before getting to Whitehorn. The unofficial marker that you made it is the suspension bridge just before the camp. Make sure to rest here as you will need it…

the suspension bridge before whitehorn
Whitehorn To Emperor Falls (5km tough)
Strap in, this section is going to get wild. I felt fully recharged and ready to go after having a well-deserved helping of pepperoni sticks. Even though I knew what was coming, I felt positive. About a kilometer from Whitehorn there is a bridge that signals the end of everything positive.
Assumed whitehorn
The bridge of hope
Just after the bridge there’s a sign with an ominous tone, “Warning: Area of steep cliffs and drop offs” and underneath that another sign, “Supervise children”. As if that was not warning enough there was a third sign on the same post, “STEEP HILL NO WATER FOR 4 KM”. I feel they could add another couple signs saying stuff like “turn back now”, “peril awaits” or “if you dare”, to really make sure the message was clear.
I did learn something during this stretch though: as it turns out, Sarah is now part mountain goat. While three of the four of us were fighting for every step and every molecule of oxygen while trying to resist the urge to chug all three litres of water that we were carrying, Sarah skipped merrily up the steep trail I think breaking into song at some intervals. This did have a downside for the rest of us though. Sarah has the power to guilt people into not taking water or rest breaks and since she was doing fine, the rest of us had to suffer (note from Sarah: I feel I wasn’t hiking as gracefully as described and I also had a lighter bag than some, but Braedyn’s description is a good confidence boost!).
The bottom of the hill. This might be my favourite photo of the trip
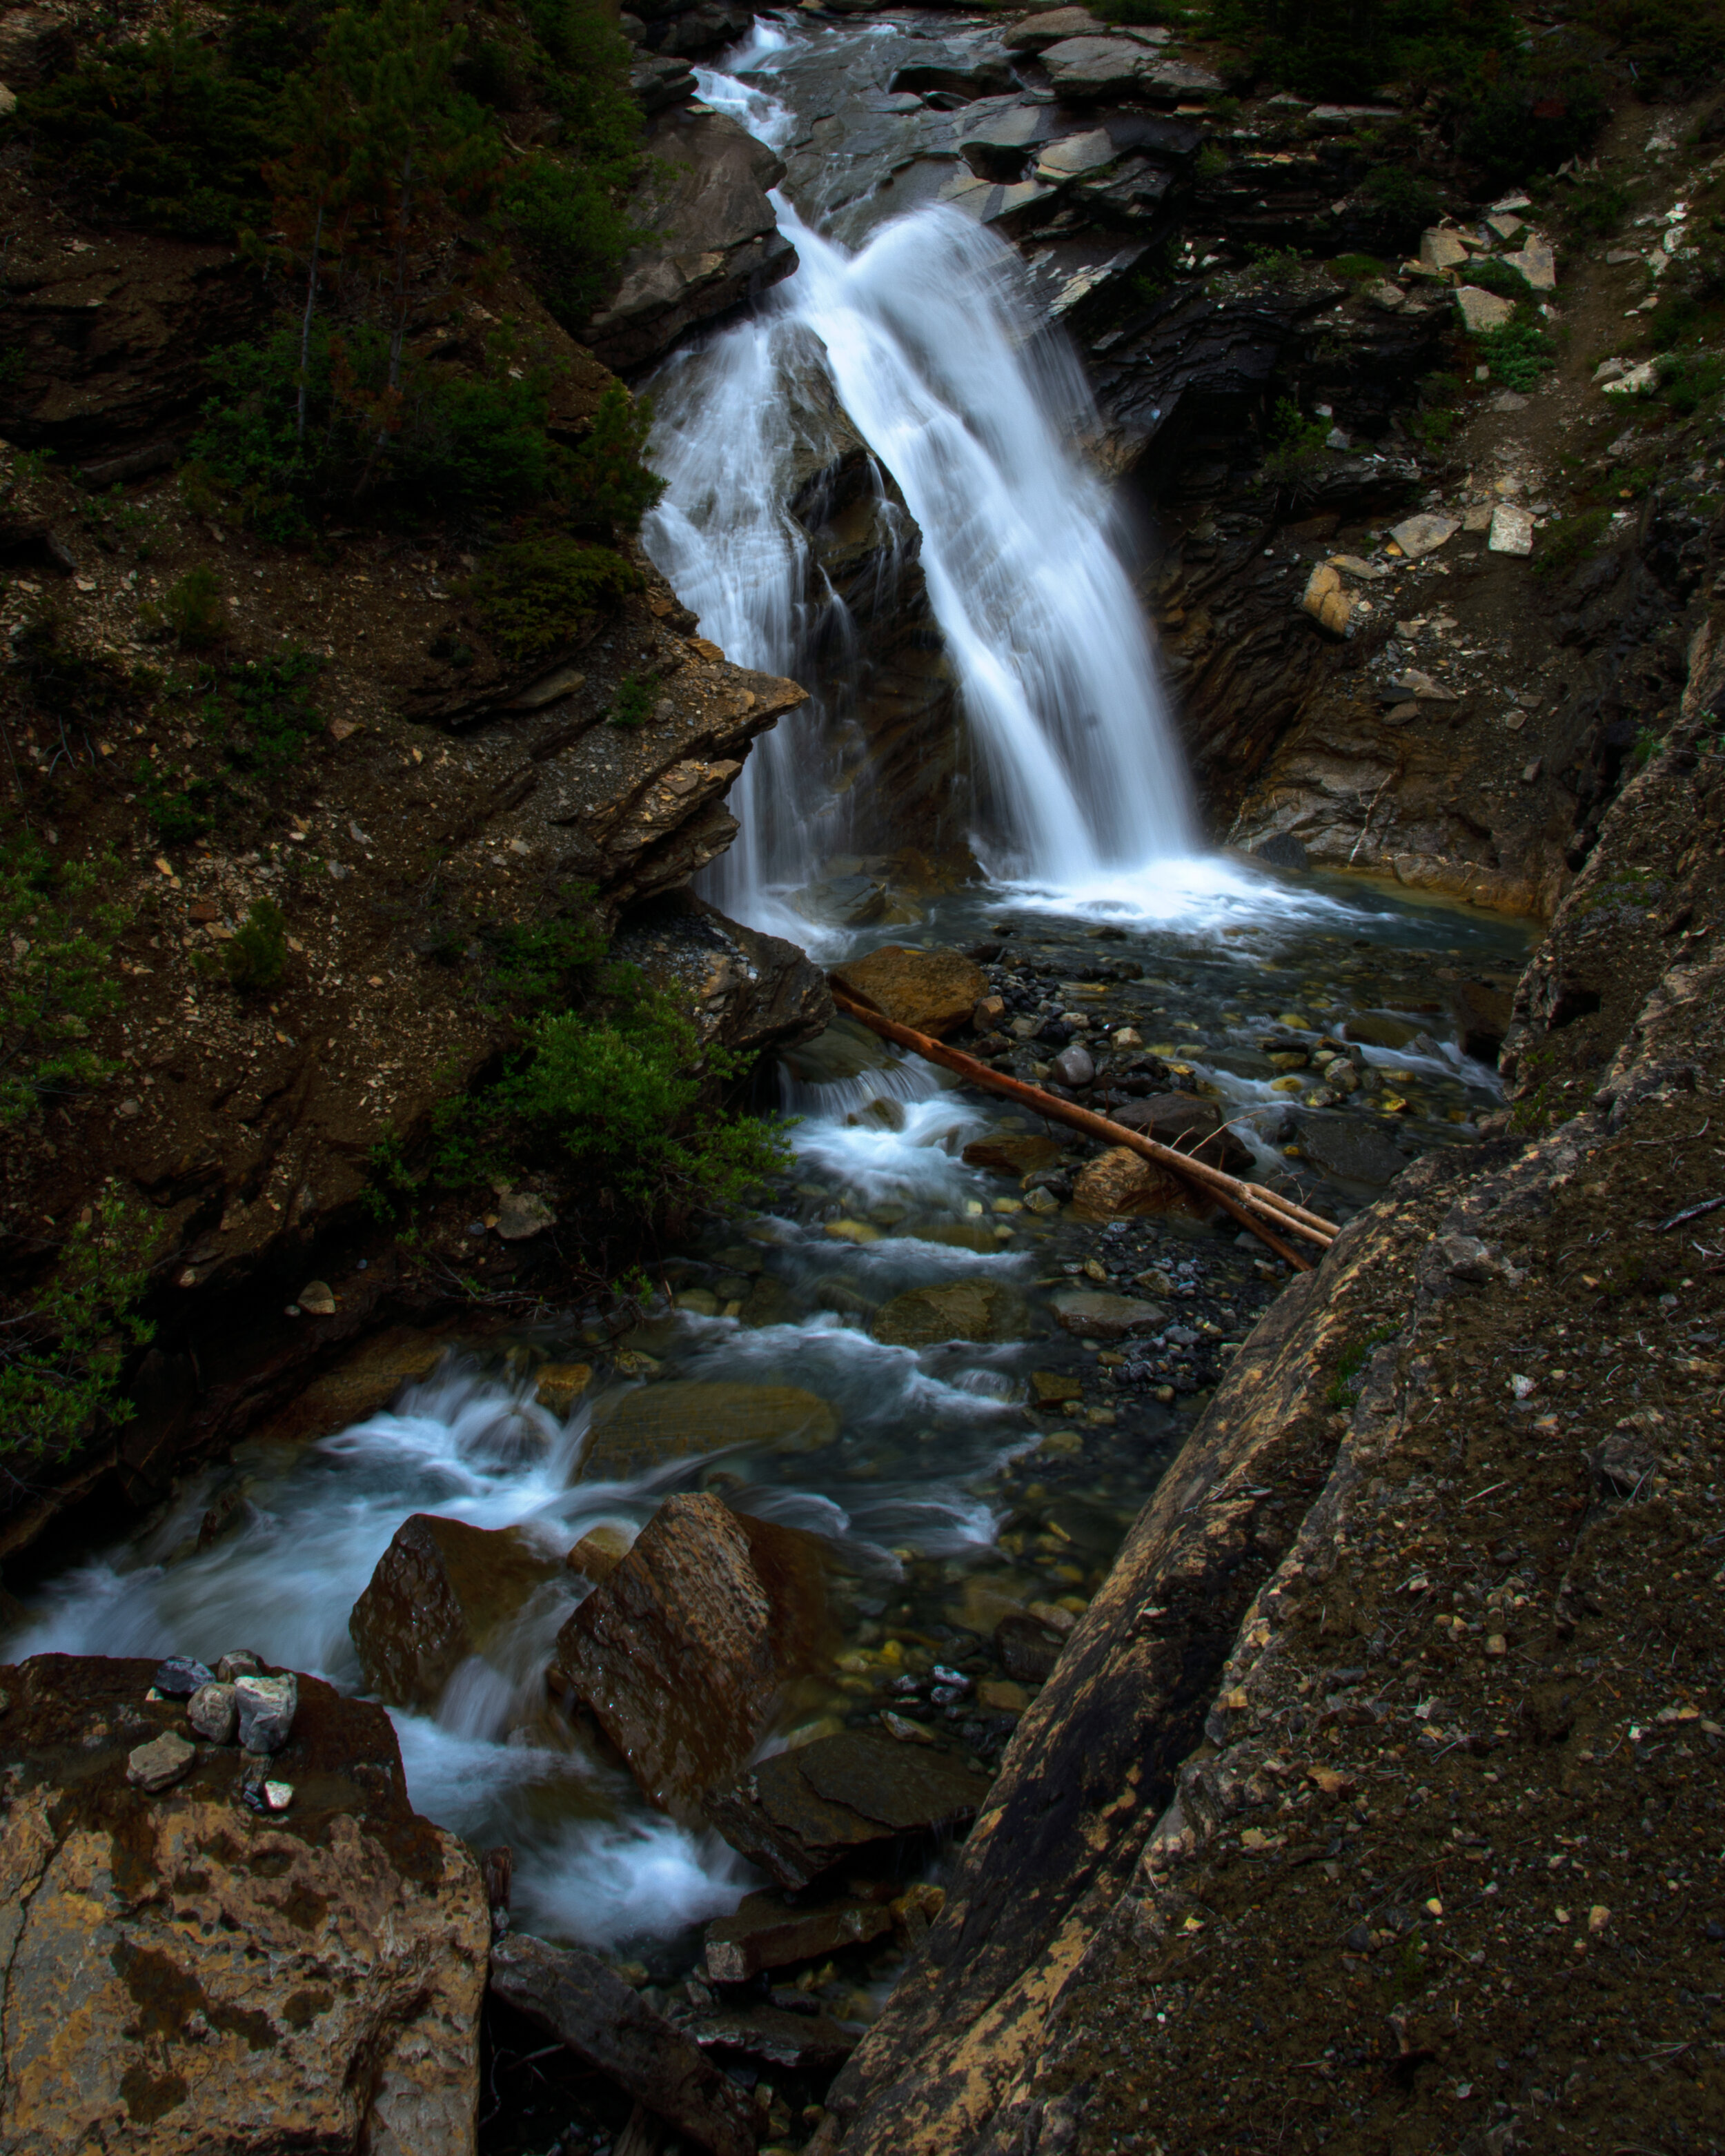
There are three checkpoints along the steep section: a third of the way up, about half way up and at the top. These are three waterfalls that you can see from the trail. The first is White Falls, then Falls of the Pool, and the third is the mighty Emperor Falls.
The second falls
Emperor Falls to Marmot (3km moderate to easy)
You can take a well-deserved rest at the plateau near the top of the climb. I would take turns going down to Emperor Falls because that way you can take off your packs for the quick hike down to the falls. Emperor Falls is massive and spectacular so I would highly recommend the side trail (note from Sarah: if you’ve come all this way, you’d be crazy not to take this short detour).
Sarah in front of Emperor Falls
Mount Robson, Emperor Falls and Sarah
After that break there is only a short climb before the Emperor Falls campground. I think this may be the third best campground because it is right along the river, which is nice. Sarah was not as sold on that aspect because you may not be able to hear a predator approaching.
The walk from Emperor Falls to Marmot is mostly along a scree bank, which was cool and again different than the other sections of trail. If you are lucky, you will get to see views of the back side of Mount Robson. Although it is usually clouded over, we got one hour the entire trip where you could see the top of the mountain.
The rest of our hiking crew
Mount Robson
Once you round a corner of the trail you are nearly there. You will walk through a rocky field crossing over a couple of streams before arriving at Marmot campground and the banks of Berg Lake. This is where we stayed and I thought it was pretty good. Some of the other campgrounds had some sort of shelter, but I have never done a backpacking trip with a shelter before, so I was not bothered. This is one of two campgrounds actually on the lake which I think gives it a big plus.
Mount Robson from marmot campground
Marmot to Berg Lake (2km Easy)
The path between the two lakeside campgrounds is very easy and goes right along the lake. The Berg Lake campground is very big and grand for a backcountry campground. There is a huge shelter with lots of tables for cooking and eating as well as some cards and other games for campers. This campground also has the better view of the glacier. We also dipped our toes in the lake here. It was unsurprisingly cold.
view from berg lake campground
This was also where we had our first wildlife encounter of the trip. On my way to one of the outhouses at the camp, I rounded a corner of a wood shelter and there was a porcupine about a foot away chomping on some wood.
Berg Lake to Rearguard & Robson Pass (1-2km Easy)
I grouped the last two campgrounds together because they are not too far apart and very similar. Once you leave Berg Lake you walk along a river and through a meadow. Both of the last two campgrounds are along the river. I wouldn't recommend these ones for a couple of reasons. First off, you walk past the lake to get to these ones. The second is that there seemed to be mosquitoes here that were not present anywhere else along the trail (note from Sarah: The first time I did this trip, I stayed at Robson Pass campground. I didn’t mind it, but there were lots of mosquitos. It is close to some day hikes if that interests you, and I actually found the campground to be very scenic)
Hargreaves Lake-Toboggan Falls (Side Trails)
There are many side trails you can do once you are set up at your campground. Sarah wanted to do the challenging Snowbird Pass hike which is a 24km round trip from Berg Lake campground and features a lot of elevation. Our group quickly overruled her and instead we did a loop from Marmot campground which took us to Hargreaves Lake, the Toboggan Falls trail and the Berg Lake campground before returning along the main trail.
A couple hundred meters from our campground the side trail begins. The first bit is very much a climb and as we climbed the wind increased. About two thirds the way up, there was an area with boulders and dead trees that I thought looked pretty cool. From there you keep on climbing until you get to a point where there is a ridge on your left with a path up to it, and the trail continuing onto the right.
Hargreaves Lake is contained within the ridge. It is super windy up top so be prepared. Make sure you turn around to get a full panorama of the Berg Lake area. We spent a bit of time up top before we’d been battered enough by the wind. Back at the bottom of the ridge we saw a couple of marmots and a pika (note from Sarah: This was my first time seeing a pika! So cool!).
Hargreaves Lake
View of Berg Lake from the ridge at Hargreaves Lake
Continuing along the main trail we got a couple nice views of Berg Lake before stopping at a river for lunch and a picture.
The entire hiking crew

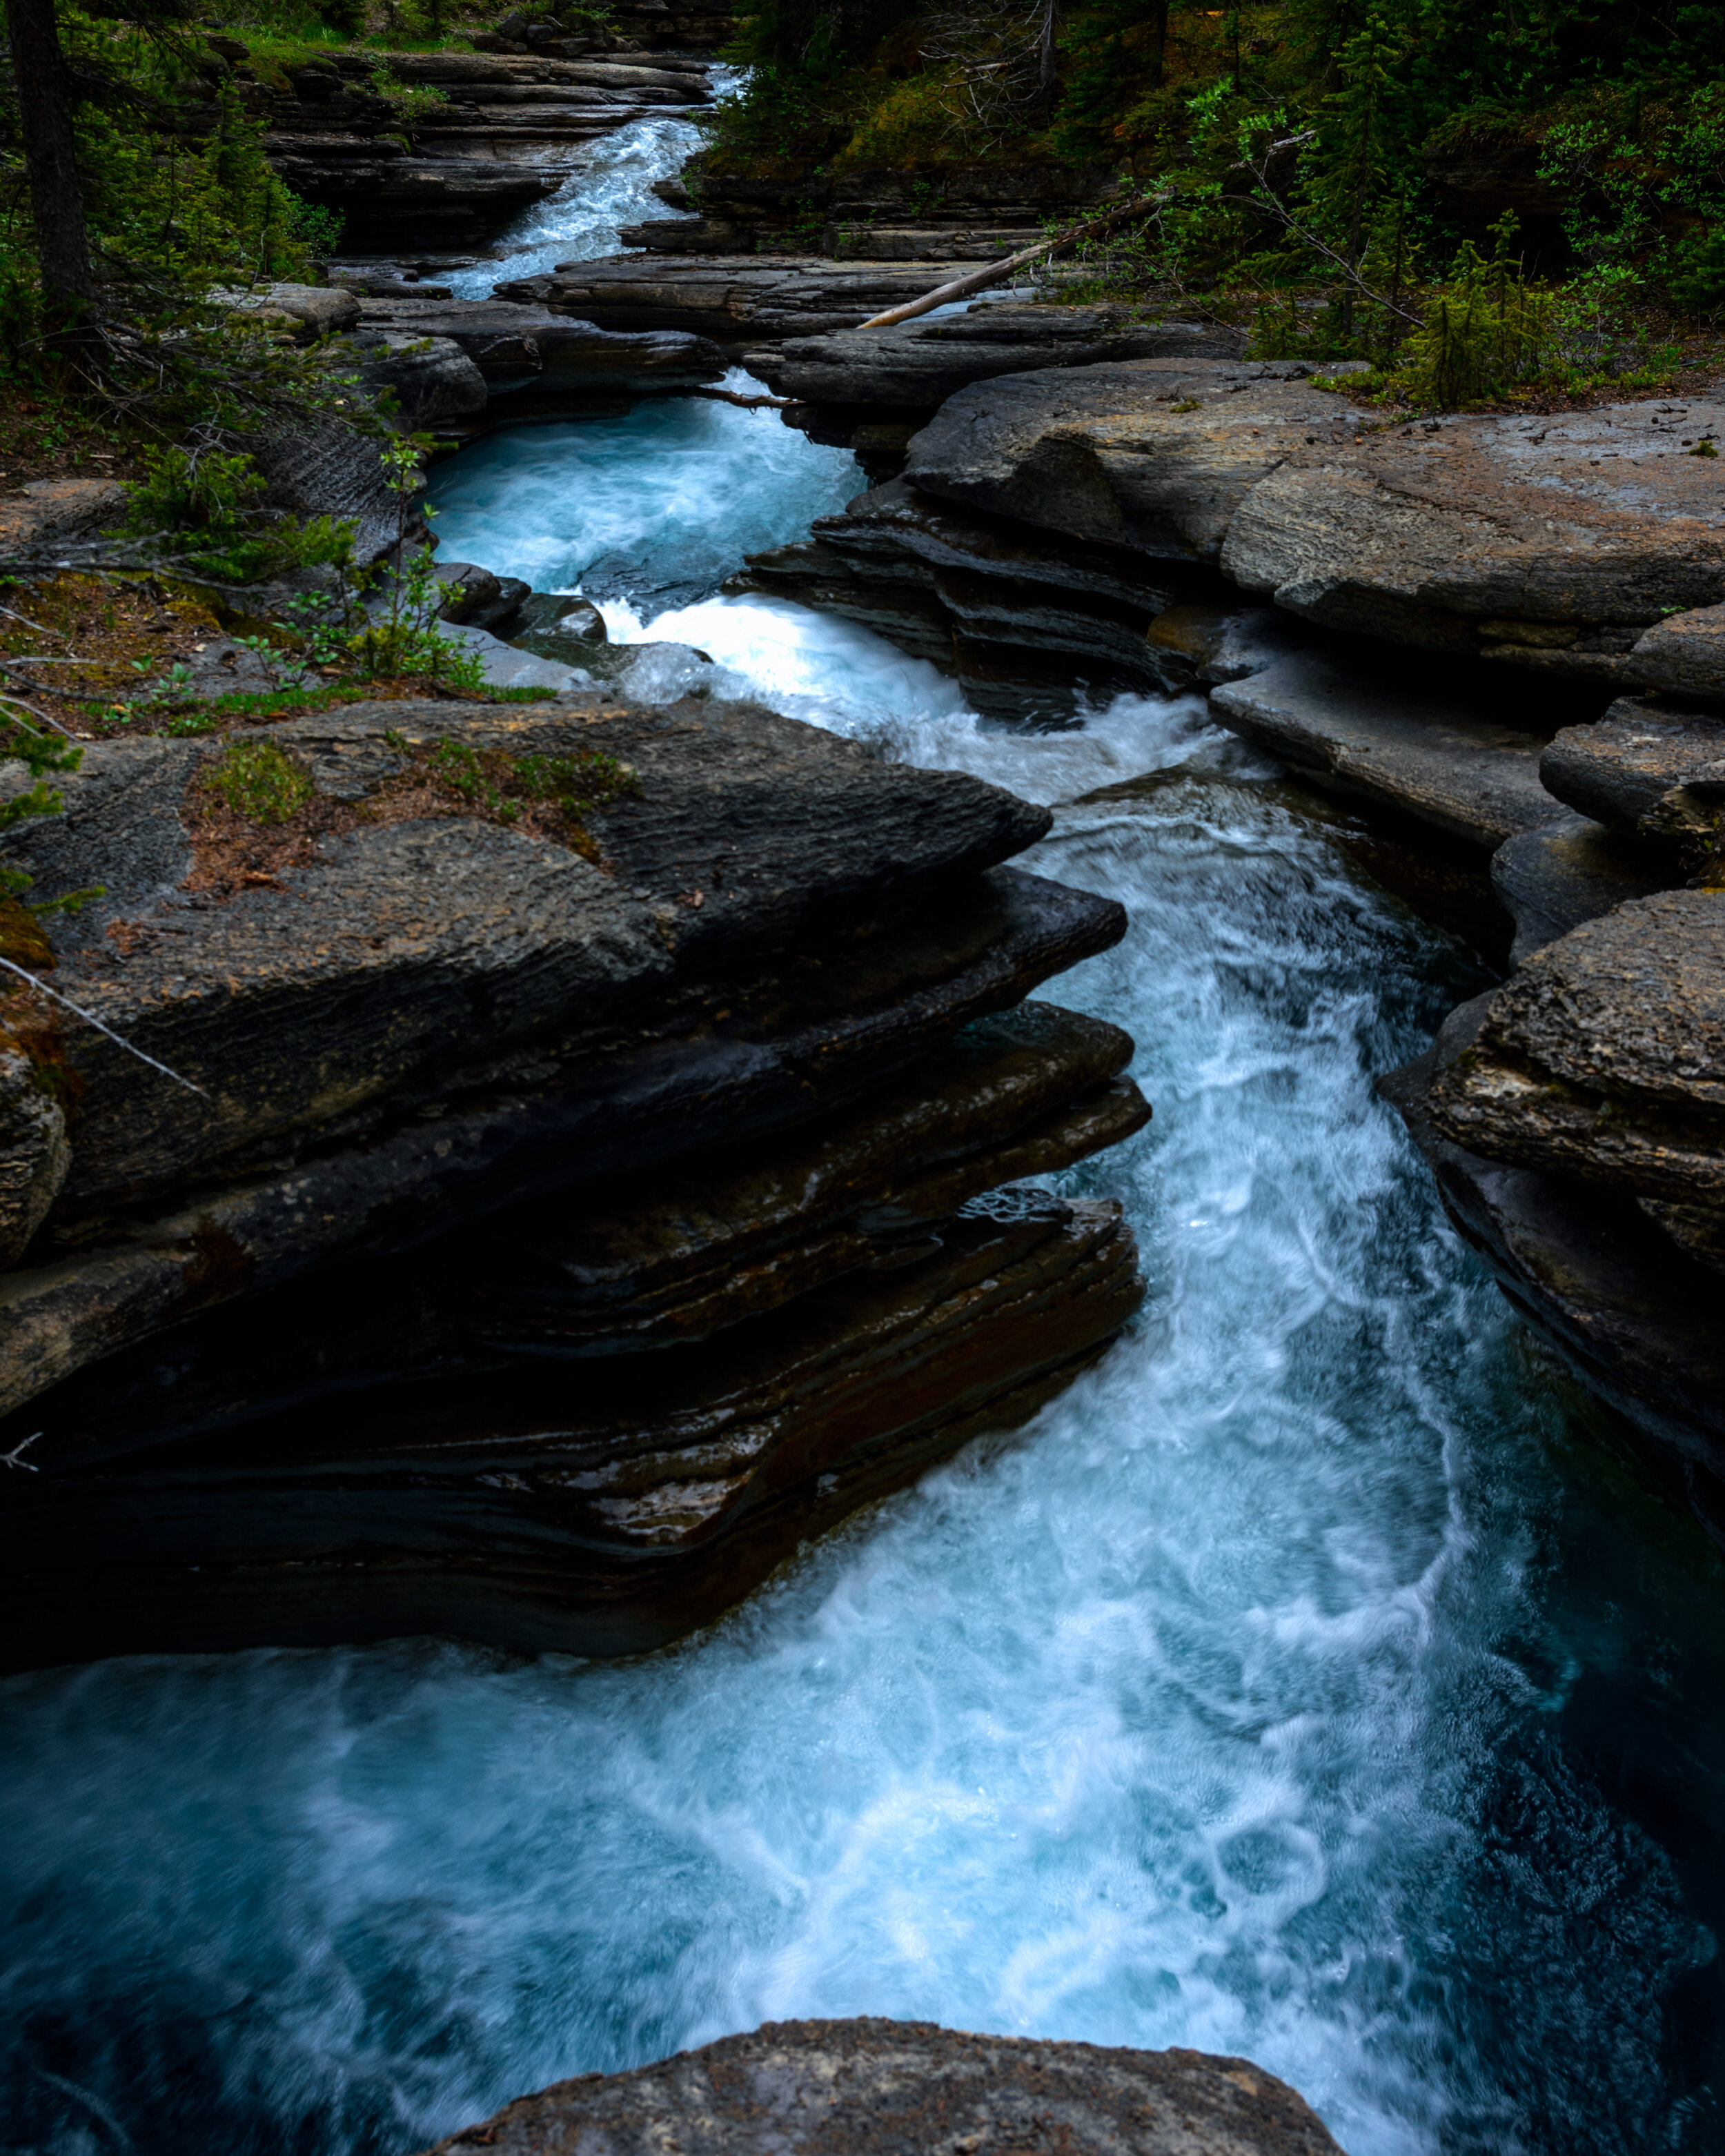
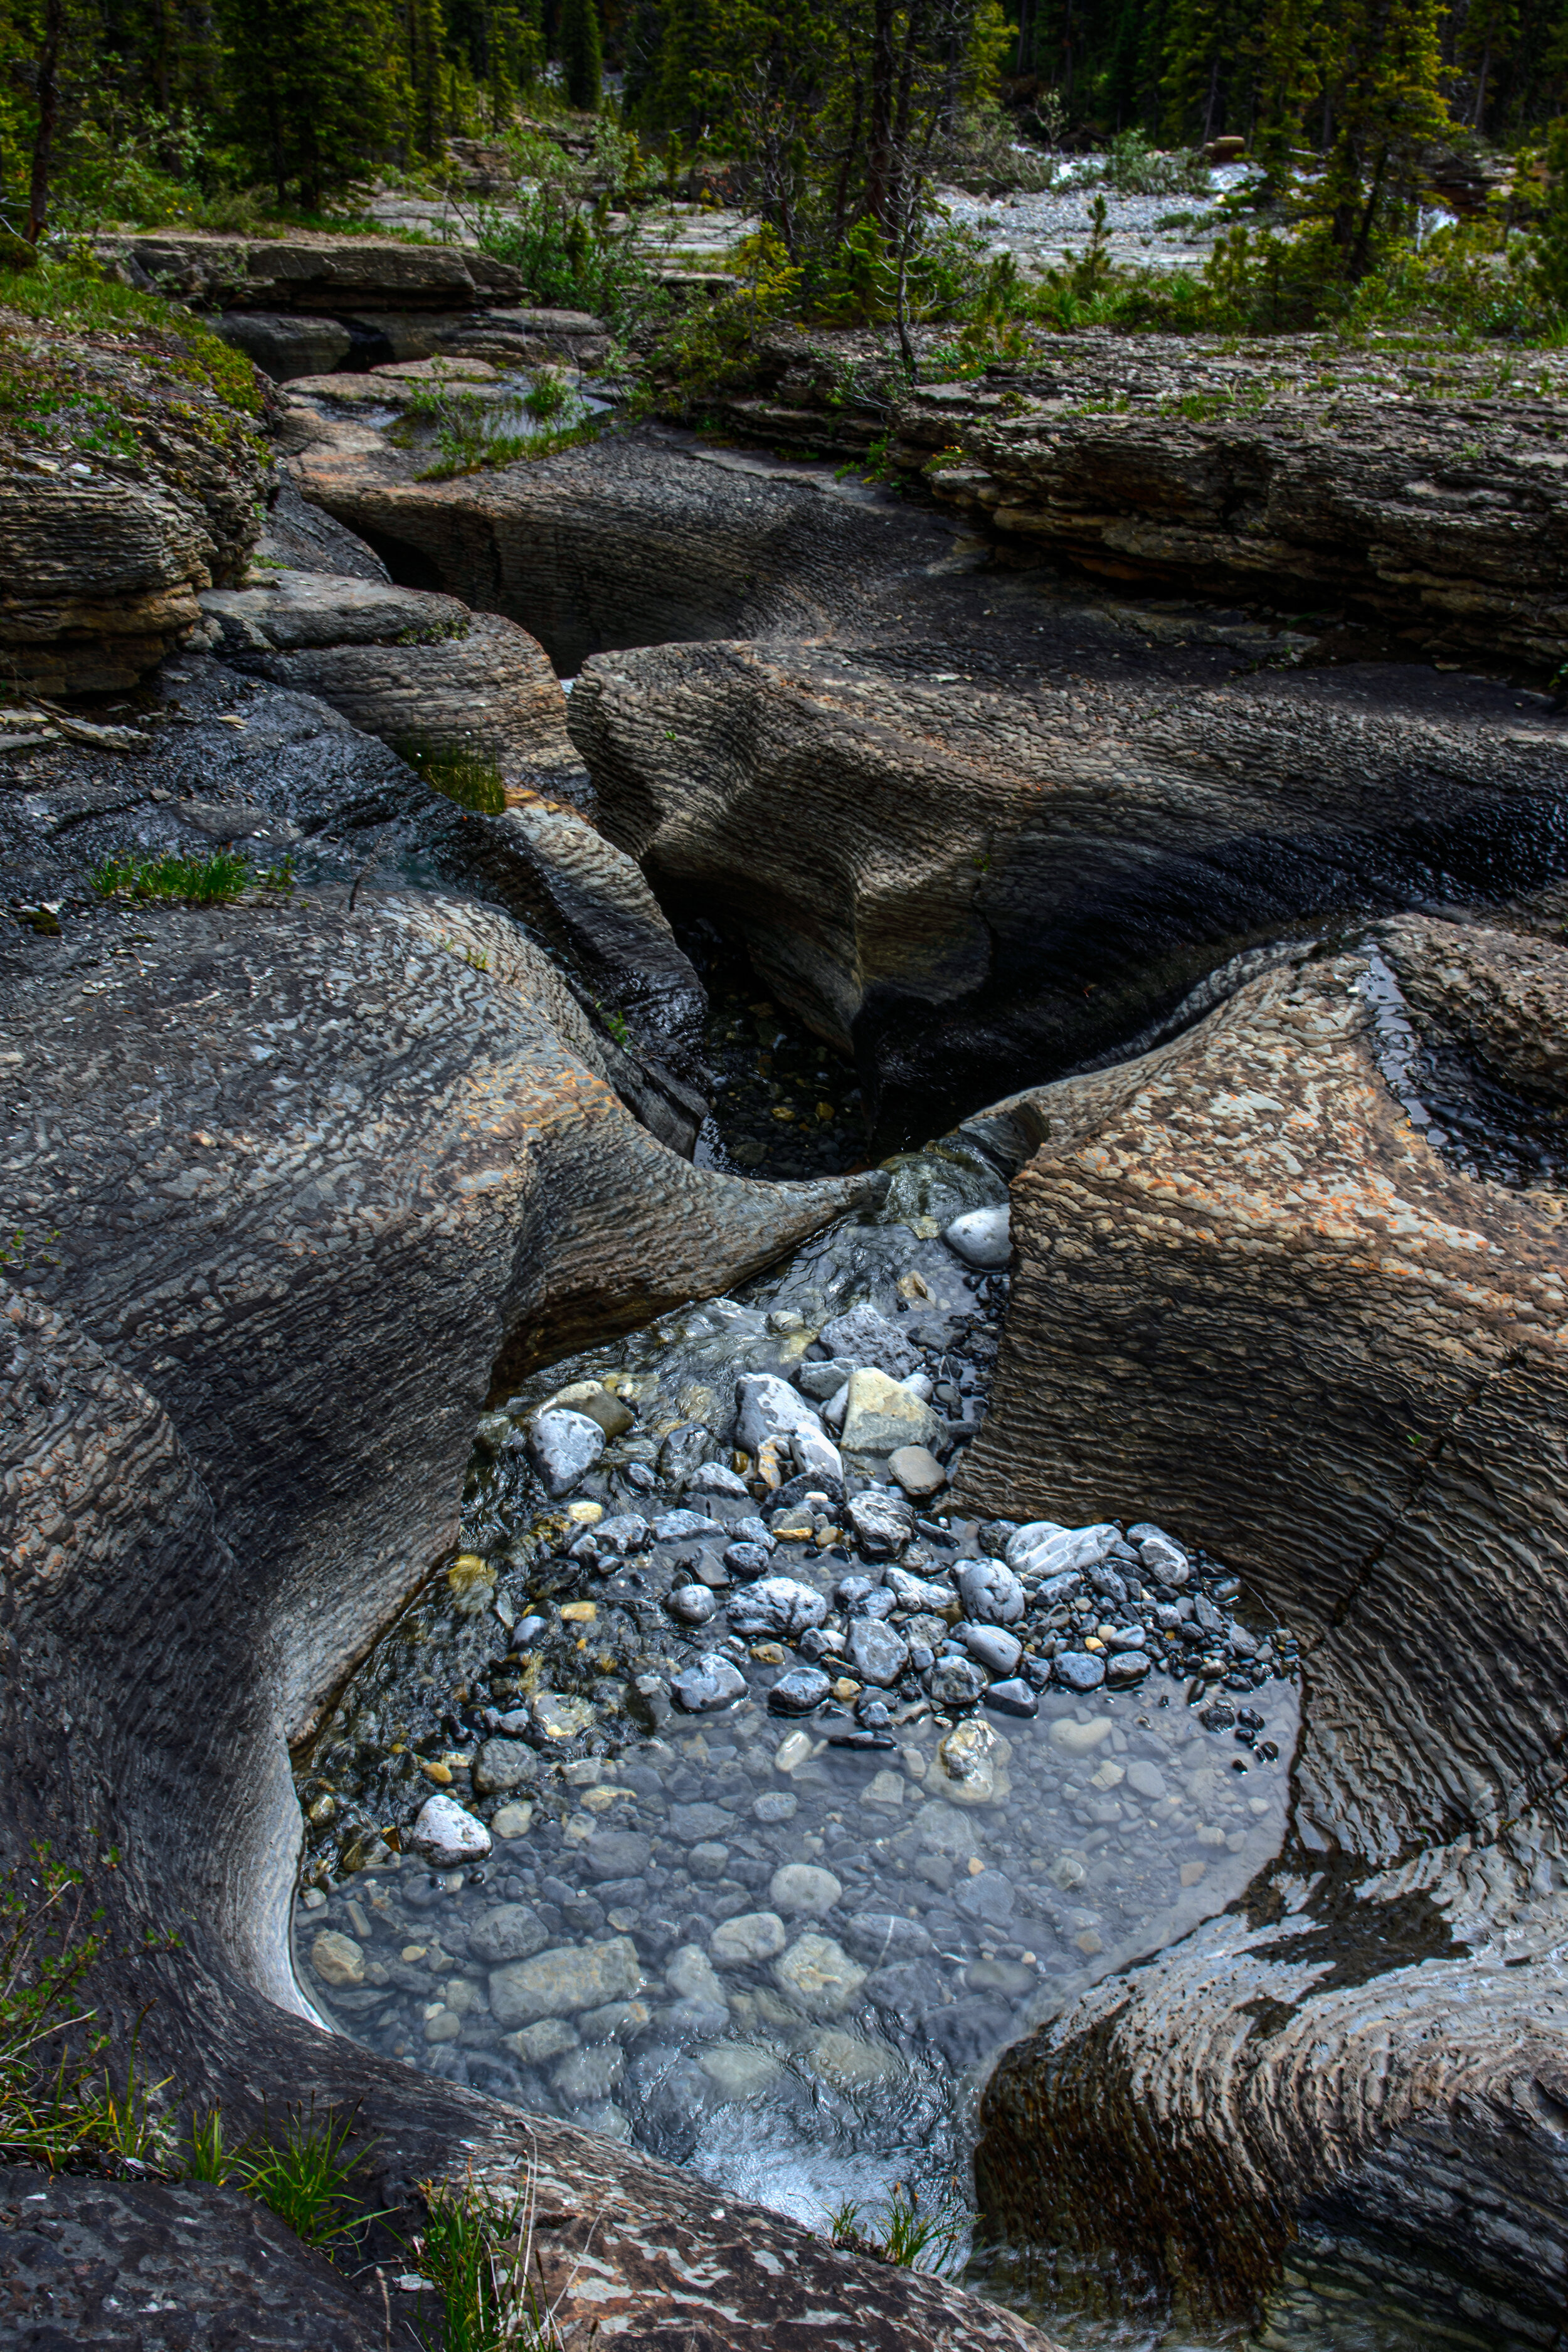
A little further along we met up with the Toboggan Falls trail. Unfortunately due to landslide activity, we could not complete this trail and basically just went back down the trail. This part of the trail was actually quite nice though. There are many areas along the way that allow you to get up close to the water, each with something different to offer. Near the bottom there was even a tiny waterfall.
On the way back we had our final wildlife encounter, and it was terrifying. We were walking along the trail when we were ambushed by a bunch of grouse chicks. There were about ten of them wandering along the sides of the trail. We quickly came upon the mother grouse. She was trying to move the chicks along and we tried to keep our distance. But at one point we must have got too close and she false charged us. This worked like a charm on us city folk. We all jumped back and cowered in fear at the mighty spruce grouse. Eventually she let us pass and we managed to get back to camp unscathed.
the terrifying spruce grouse
Summary
Overall, this is an excellent backpacking trip for a variety of experience levels. I (Sarah) did this as my first backpacking trip a few years ago, and I enjoyed doing it a second time. In fact, I’m sure I would do it again. There are so many ways to add variety to the hike, such as camping at different campgrounds or trying the different day hike options. People even hike and run the trail in a day! I would recommend doing this as a three day, two night trip, but if you are interested in the day hikes you may want an extra day.